


Overview#
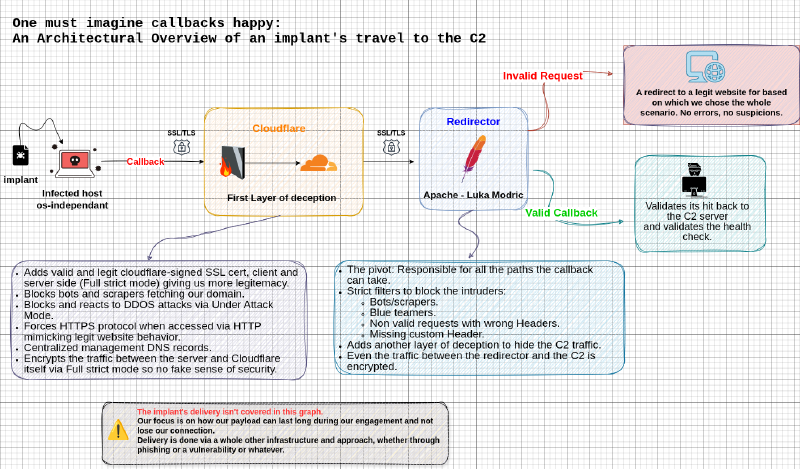
The hard part isn’t about finding a vulnerability in the target assets, that, as a matter of fact, is very common and we’re pretty sure we will find some. But, maintaining that connection without getting caught by NDRs and blue teamer is challenging. So our C2 communications should look legit, logic and very well blend within the usual and common traffic sinffed by NDRs. In this post we’re aiming at hiding the outbound C2 traffic from the compromised host to our redirector (which will then forward it to our C2 if it matches the correct rules).
The idea is to get the implant to connect to our domain (which we already verified its categorization, legitemacy, name choice..etc) using valid SSL certificate from a known provider which will make the traffic look normal and wouldn’t trigger any alerts caused by custom certs.
For our case, we’ll use a full encryption between the implant, Cloudflare and the redirector, so not only between the client (the implant) and Cloudflare, but also between Cloudflare and the redirector. This will limit the firewall rules we put for our redirector, protects all the channel from both client and server side and ensures the tunnel cannot be decrypted.
Warning
Of course, the payload delivery isn’t coverred in this part. This is all about an opsec-complient post-exploitation persistence.
We assume we already have a foothold within the target network.
Cloudflare for DNS management#
Switching to Cloudflare#
First, we need to make cloudflare as our DNS management platform to proxy the connections to our domain via cloudflare nameservers. This could be done from whatever registrar your bought your domain from and it is pretyy much straightforward to acheive.
- Visit Cloudflare dashboard.
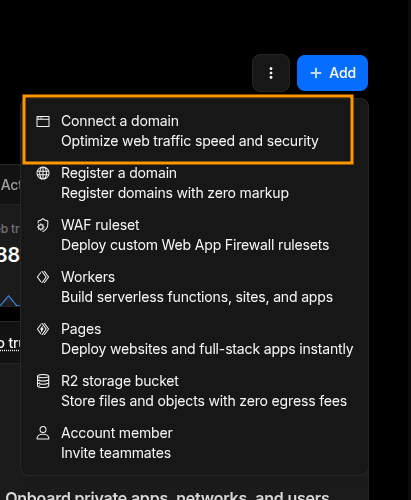
- Click on Add domain.
- Fill out the domain name field and the other Bots settings (Block all) and the free plan (of course).
- Cloudflare will give you the nameservers you’ll need to connect your domain to cloudflare’s proxies.
- Visit your registrar’s management page for your domain
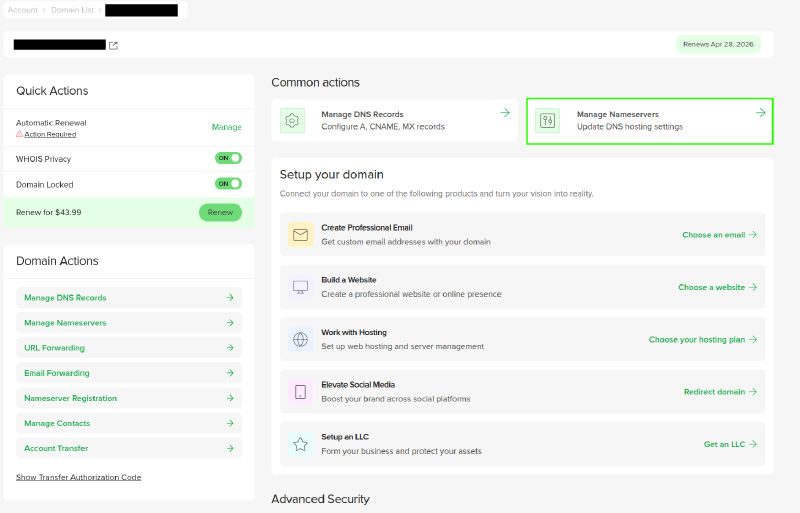
- Go on the nameservers settings, delete the nameservers your find and add cloudflare ones.
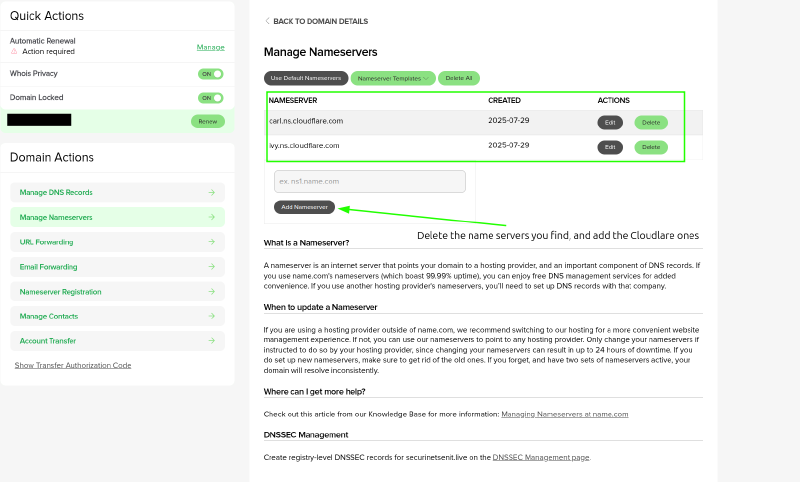
- Now you can manage your domain’s DNS settings from Cloudflare dashboard, you’ll receive a mail from Clouflare as soon as it links.
- Wait for a couple a minutes for it to propagate properly, and you’re ready to go.
Testing#
testing Nameservers#
$whois domain.tld
$nslookup domain.tld
$dig ns domain.tld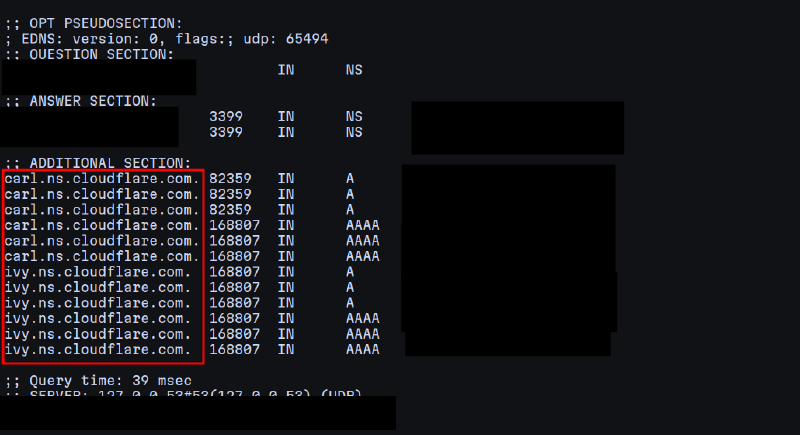
Which will show Cloudlfare’s given nameservers.
Testing Propagation#
Or visit DNS Checker to see the connectivity of your domain worldwide.
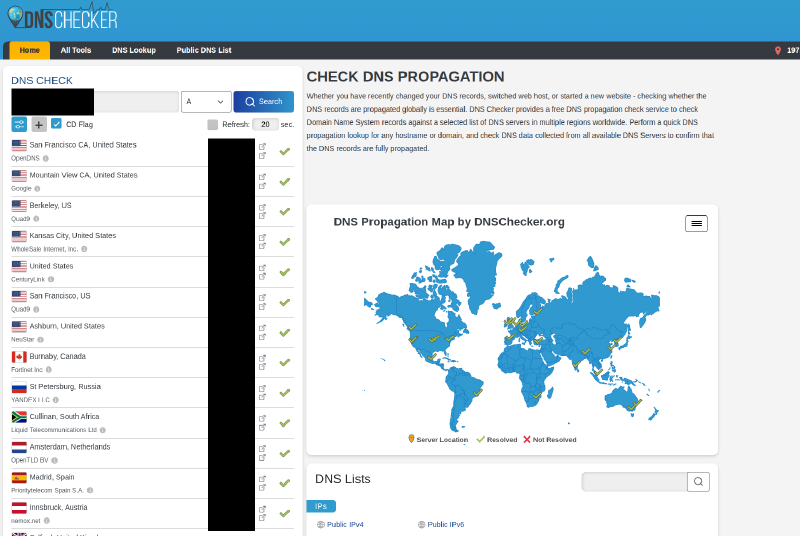
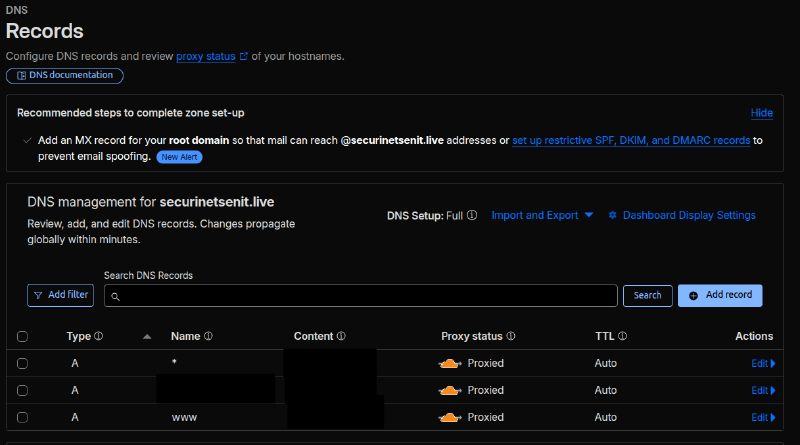
and our dns config should contain at least these entries (the * depends on your configuration, i removed the * later)
Cloudflare SSL/TLS overview: Flexible vs Full (strict) mode#
Cloudflare offers many SSL/TLS configurations:
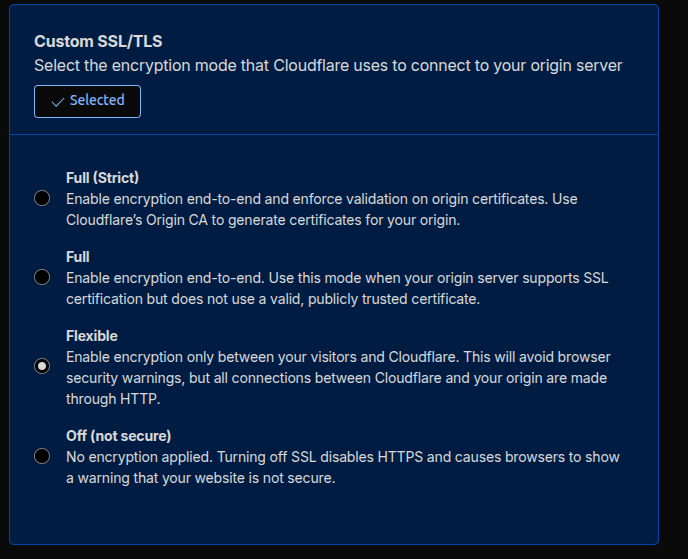
Flexible is a client-side configuration. It onyl encrypts incoming traffic and then sends it unencrypted to the redirector. That is the simplest configuration since it won’t cause any certificate issues. But that ain’t us.
We’ll aim at the Full (strict) mode and its description is self-explanatory.
For this, we will need to create a valid cloudflare certificate for the redirector, import it to Apache (or whatever redirector you chose) and go on.
Requesting a Cloudflare certificate#
Go to the Origin Server on SSL/TLS section and request a certificate:
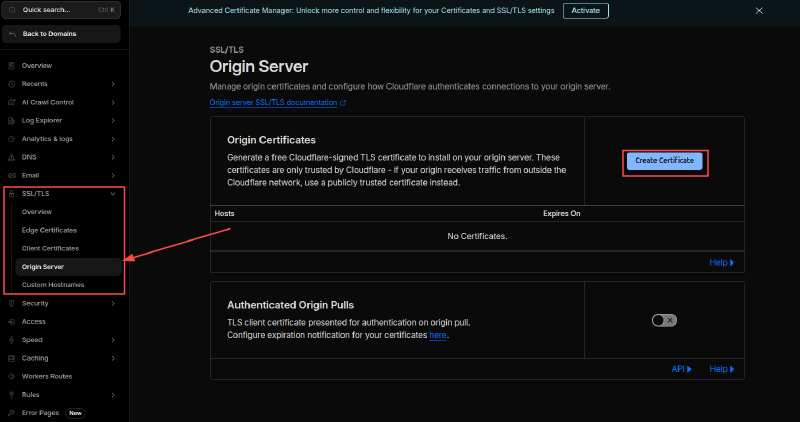
Choose the subdomains, the private key type and the duration you wish: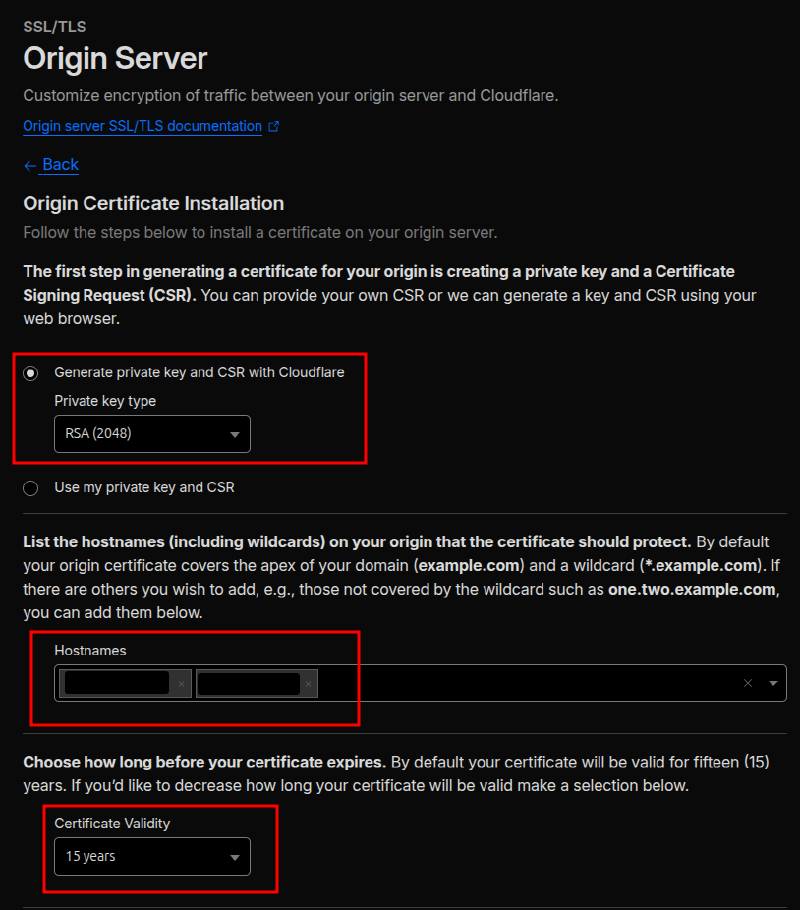
Now, SAFELY save these two files. They shouldn’t be shared or open-sourced or bad things will happen, surely.
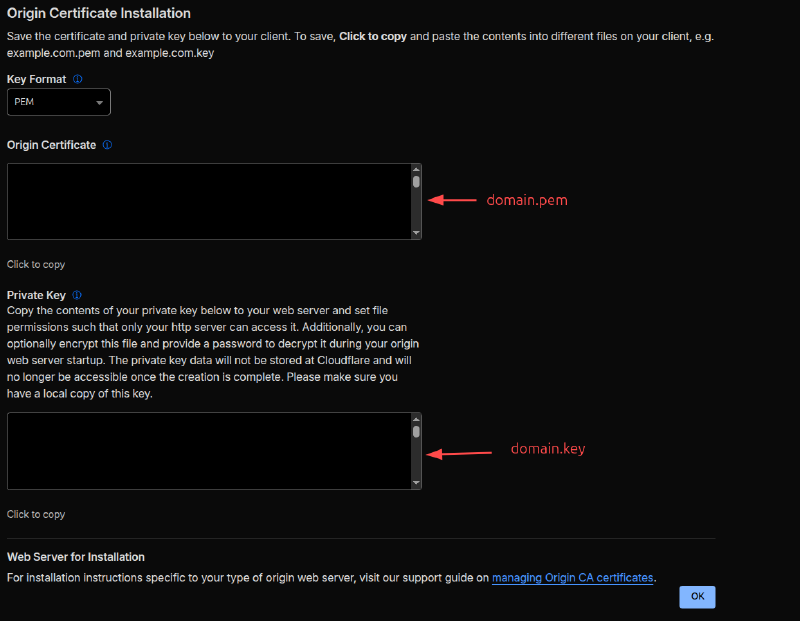
and save them to:
/etc/ssl/certs/enit-kedux.pem/etc/ssl/private/enit-kedux.key
SET THE PROPER PERMISSIONS ON THE PRIVATE KEY.
sudo chmod 600 /etc/ssl/private/enit-kedux.keyApache will then import them when restarted.
Click on Ok and you should be okay
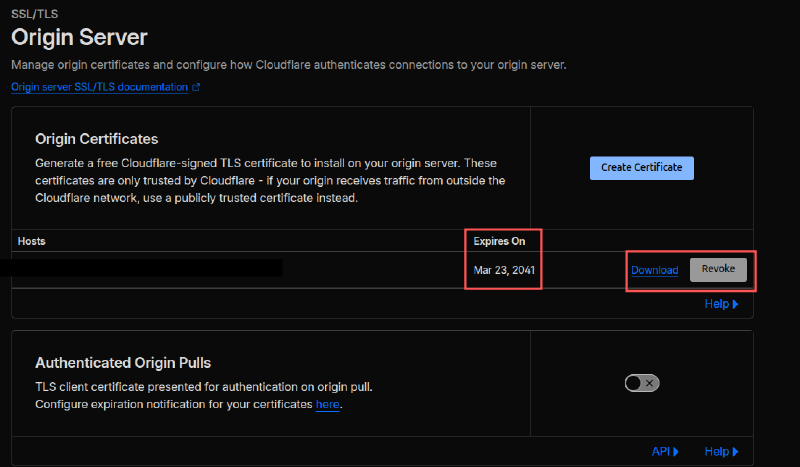
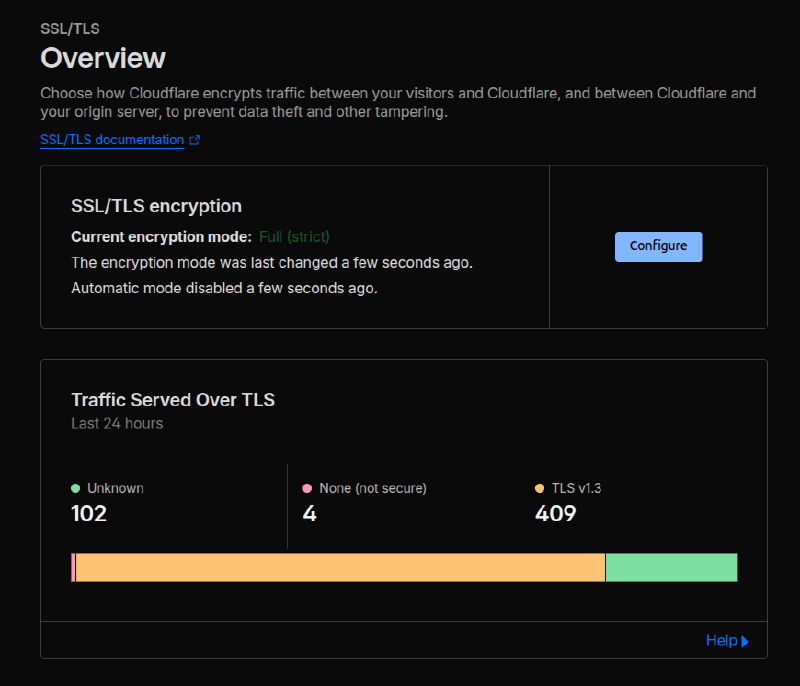
About the certificate
Note that you can revoke or download your certificate for later use sharing with other infrastructure maintainers. The essential point is that you should always deal with it safely to not publicly leak it.
Import the cert to the redirector#
Now we should point Apache to where the certificate is. For this we need to add these entries to its /etc/apache2/sites-available/redirector.conf
    <SNIP>
    ServerName domain.tld
    ServerAlias domain.tld

    SSLEngine on
    SSLCertificateFile /etc/ssl/certs/domain.pem
    SSLCertificateKeyFile /etc/ssl/private/domain.key
    <SNIP>
And /etc/apache2/ports.conf should look like the following:
<IfModule ssl_module>
    Listen 443
</IfModule>

<IfModule mod_gnutls.c>
    Listen 443
</IfModule>
Now we should enable the SSL mode and restart Apache.
sudo apache2ctl configtest
sudo a2enmod ssl
sudo systemctl restart apache2